

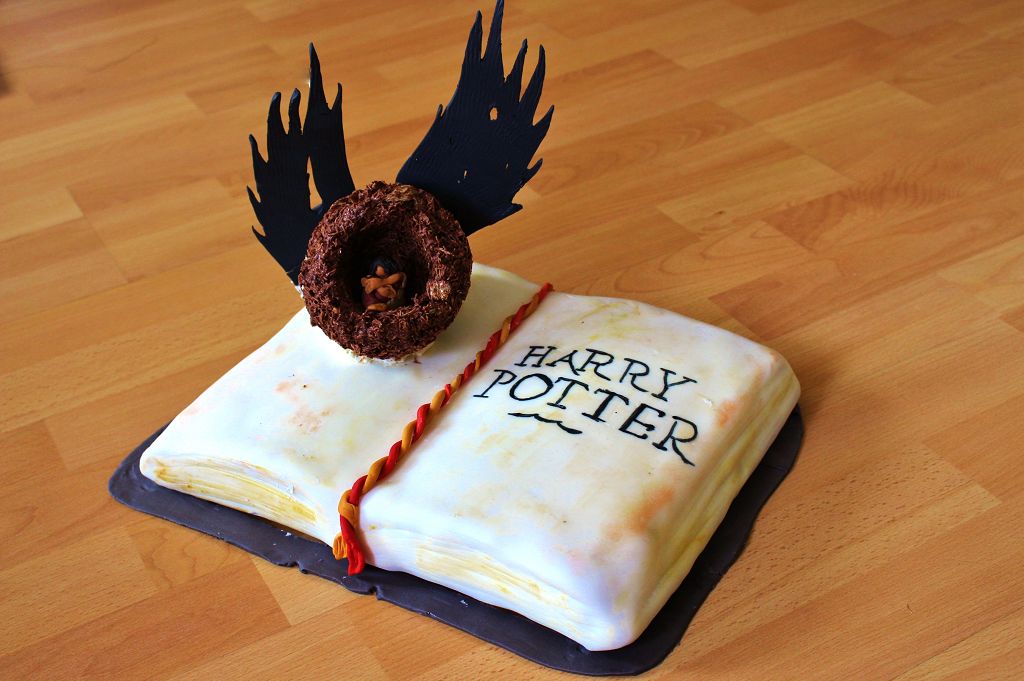
(Deutsch) I planned to make this Harry Potter cake the second I saw the cover of “Harry Potter and the cursed child”. The wings, the nest, the book – I mean, it was just asking to be turned into a cake. I admit it took a while for me to actually do it but last week I got a huge motivation boost – I managed to get tickets for the Harry Potter play in London after queuing for only 11 hours online. And the tickets sadly are for November 2017, but –hey– so worth it!
Harry Potter was a huge part of my childhood (well, teenhood really) and I am still crazy about it. I loved the books and the films and I am so much looking forward to see the play. I am currently reading the 8th book and who would have thought that I would ever get to enjoy the sweetness of reading a Harry Potter book for the first time again? It is simply amazing to dive into the wizard world again and how could I possibly celebrate this better than with this Harry Potter and the cursed child cake? 🙂
As always – please forgive me, if this isn’t native-language-level writing. I am German after all but I am doing by very best.
For this cake you’ll need…
- Cake
- 6 free-range eggs
- 300 g sugar
- 1 pinch of salt
- 1 tablespoon vanilla essence
- 250 g butter
- 500 g plain flour
- 2 teaspoons of baking soda
- 650 ml milk
- 50 g white and dark chocolate drops
- Cream cheese buttercream
- 180 g butter (soft)
- 120 g cream cheese (full fat)
- 150 g Icing sugar
- 1 teaspoon vanilla essence
- Decoration
- 500 g white fondant (for the pages)
- 120 g black fondant (for the wings and the hair of the figurine)
- 20 g yellow and red fondant (for the bookmark)
- 2 long toothpicks (to secure the wings)
- food colouring: light brown, brown, beige (figurine)
- some cocoa powder (or even better: powdered food colouring in yellow, brown and red for the antique-looking pages)
- black food colouring pen (writing)
- 60 g gum paste (wings)
- 100 g Shredded Wheat (nest)
- 200 g Milk or dark chocolate (nest)
Preparing the decoration the day before baking
- The nest: Melt the chocolate and mix them with the shredded wheats. Pour mix into a bowl (use cling to prevent it from sticking) and mould a hole in the middle with a spoon. Cool for at least 30 minutes.
- The wings: Mix the black fondant with the gum paste and roll it out about 0.5 cm thick. Cut out two wings and scratch them with a toothpick or a fork for a feather-look. Glue the long toothpicks to the back side of the wings using leftover fondant. Leave the sharp bit out so you can later stick it into the cake. Let it try for a least 2 hours, better overnight.
- The figurine: I used about 30 g of Fondant and coloured equal parts dark brown, light brown and beige as well as a tiny bit black for the hair. Mould into shape and use a toothpick for details like fingers and hair.
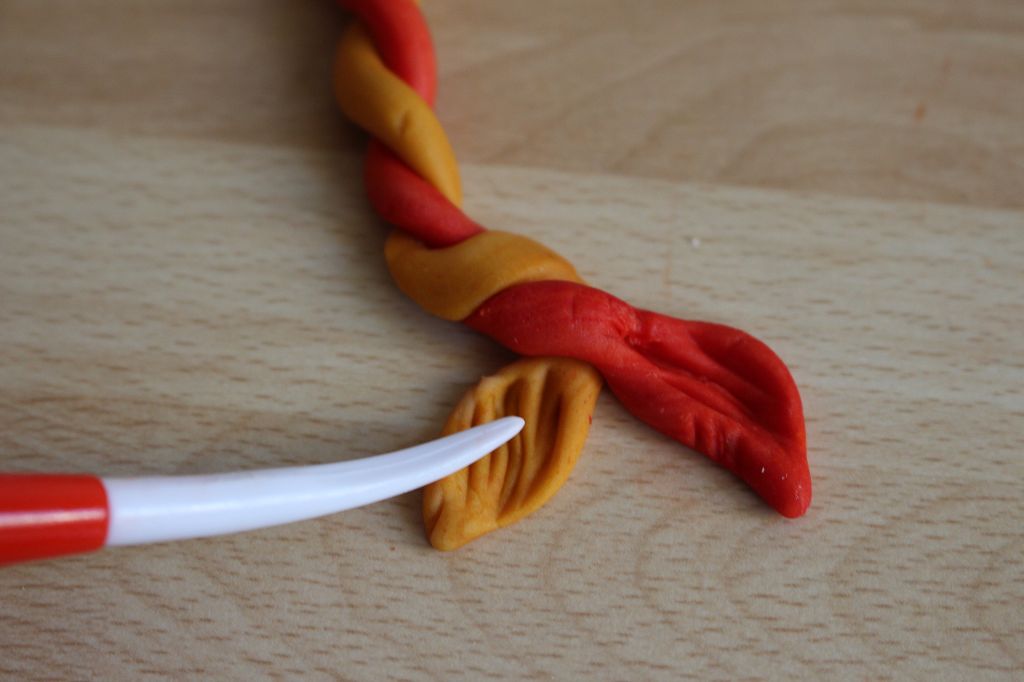
- The bookmark: Roll the yellow and red fondant into thin sausages and twist them with each other. Use a small fork to create the end bits.
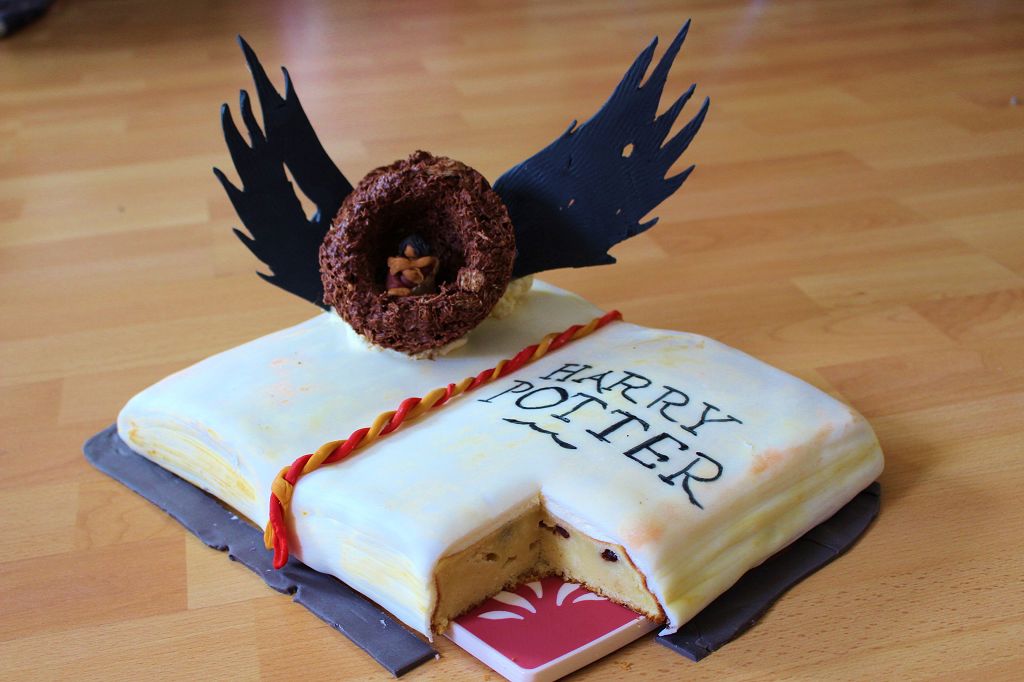
1.) The cake: Beat the eggs, sugar, salt and vanilla until fluffy (haha-Fluffy. Like in Harry Potter part one….anyways). In a second bowl, mix the flour with the baking powder and add the butter. Stir until mixed and add the milk until you get a smooth batter. Carefully mix with the egg-batter and pour into a book-baking-mould. Now pour the chocolate drops from above – they will sink in while baking. Bake for 40 minutes in the preheated (180 °C) oven and let cool entirely.
2.) The cream: Beat the soft butter for at least five minutes on a high speed until white. Then sift in the icing sugar and mix again. Finally, add the cream cheese and the vanilla and mix again for a few seconds until combined. Set about 2 tablespoons aside for later to glue the nest on the cake. The rest you can now apply to the cooled cake and spread evenly. Refrigerate for at least an hour so it’s easier to apply the fondant.
3.) The decoration: Knead the white fondant until soft and roll out very thin so it will cover the entire cake. If it’s sticky, use starch (not icing sugar). Carefully cover the cake with the fondant and smooth it out with clean hands. Cut off excess fondant. Now use the back end of a fork or spoon to mould page-like lines to the sites of the cake.
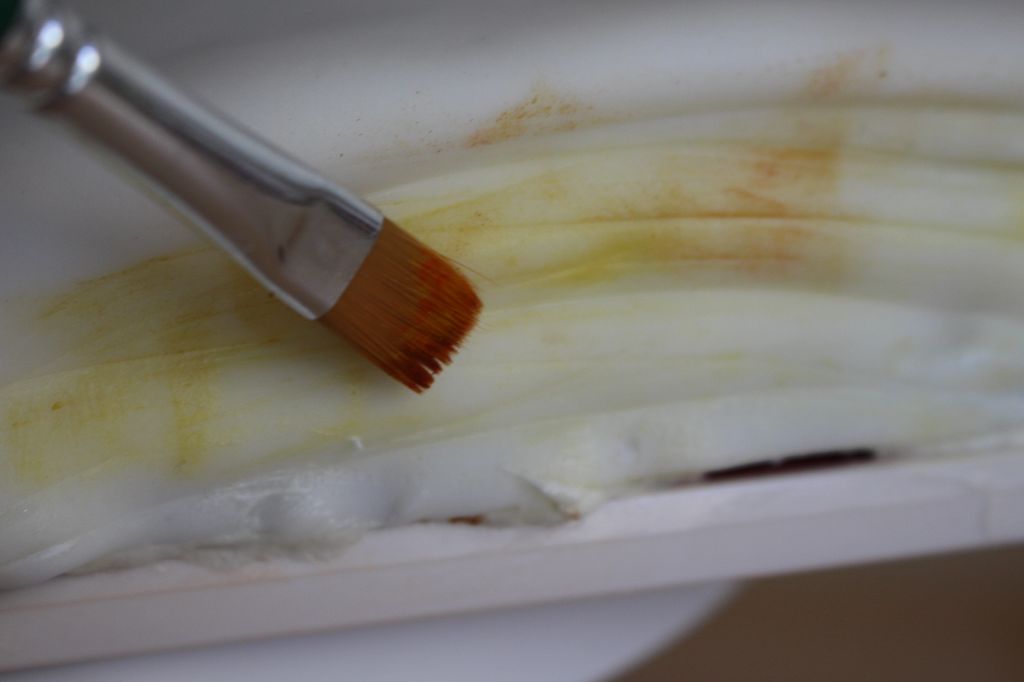
4.) The „antique“ look can be created with powdered food colouring or even a bit of cocoa powder. Use a clean brush with very little powder and spread it around and on the cake until you are happy with the result. Remember – less is more!
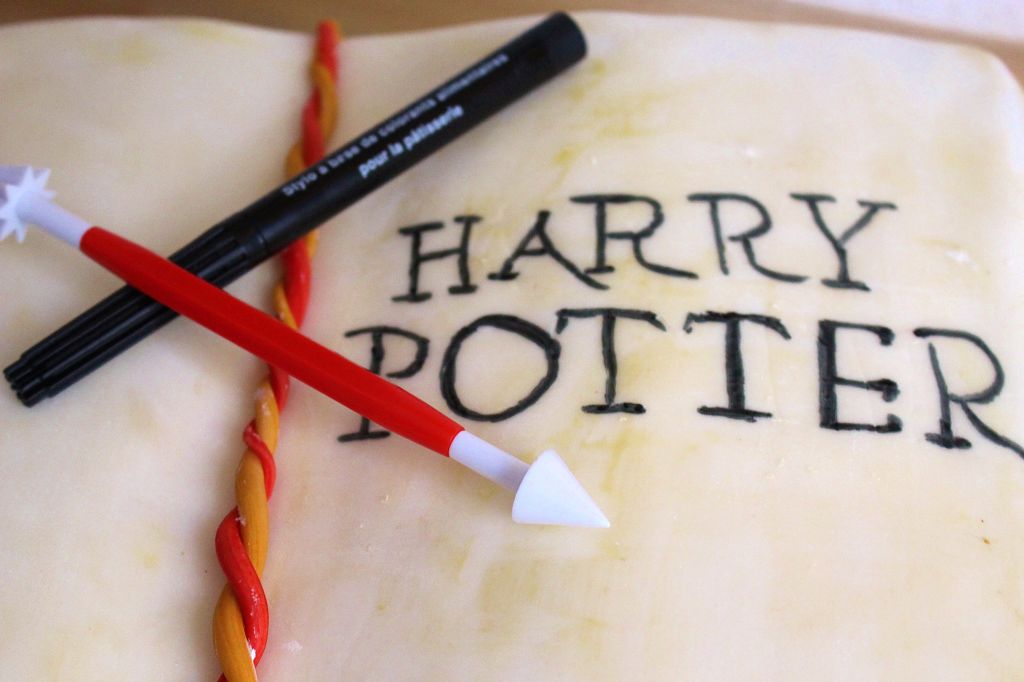
5.) Place the bookmark in the middle of the cake. Use the food colouring pen to write „Harry Potter“ on one page (use a toothpick to pre-write it to get it right) and use the cream you set aside earlier to glue the nest with the figurine inside on the other side of the book. Now carefully stick the wings with the toothpicks first in the cake right behind the nest. Mischief managed! (or just: we are done here!)


Equipment Recommendation
I like using „Masa Ticino Tropic“ as a fondant because unlike other fondant it tastes really nice. For the food colouring I highly recommend „Rainbow Dust Colours“ which I used for literally all the colouring in this post. The gum paste, food colouring pen, book baking tin and tools for moulding the fondant are all by Birkmann.
I literally recommend what I like and I am not getting paid for it 🙂
You wanna see more? Follow my blog!

